
Ptolemy II Installation in Ubuntu 22.04

Installation of Ptolemy II in Ubuntu 22.04
This post shows the installation instructions of Ptolemy II in Windows 11 and Ubuntu 22.04 Operating System. 
Ptolemy II is used to simulate and emulate discrete systems, Synchronous dataflow, dynamic Dataflow, FSM, etc. The software is free and open source and its based on Java. 

The complete instructions can be found in this video 


Tools needed:
1. JDK is needed (preferably JDK 11, if you have already another version of JDK, no issues you can install JDK 11 as well and you can change the runtime java based on the need. For more details on how to switch the java version in Ubuntu, Check this video)

2. Ptolemy Software (can be downloaded from here

Step 1: Getting ready with your Ubuntu 22.04 OS

Run the following commands 

$ sudo apt update 
$ sudo apt install openjdk-11-jdk build-essential autoconf automake libxmu-dev

Step 2 - Extract the ptolemy software through the GUI window and set the environmental variable
Right click over the file and click "Extract Here"
Set the PTII environment as per the following commands.
Open the terminal and open the file using the command 

$ gedit ~/.bashrc
and copy the following line in the line number 4

export PTII=$HOME/ptII11.0.1.src/ptII11.0.1

Step 3: Installation of Ptolemy II 
I have installed in my home folder as per this path (/home/pradeepkumar/ptII11.0.1.src/ptII11.0.1/) 

Open a terminal and execute the following commands 

$ cd ptII11.0.1.src/ptII11.0.1/
$ ./configure --enable-verbose 
$ make 
$ cd bin 
$ ./vergil 

Once the installation over, you can open the vergil software and it shows the screenshot like this.
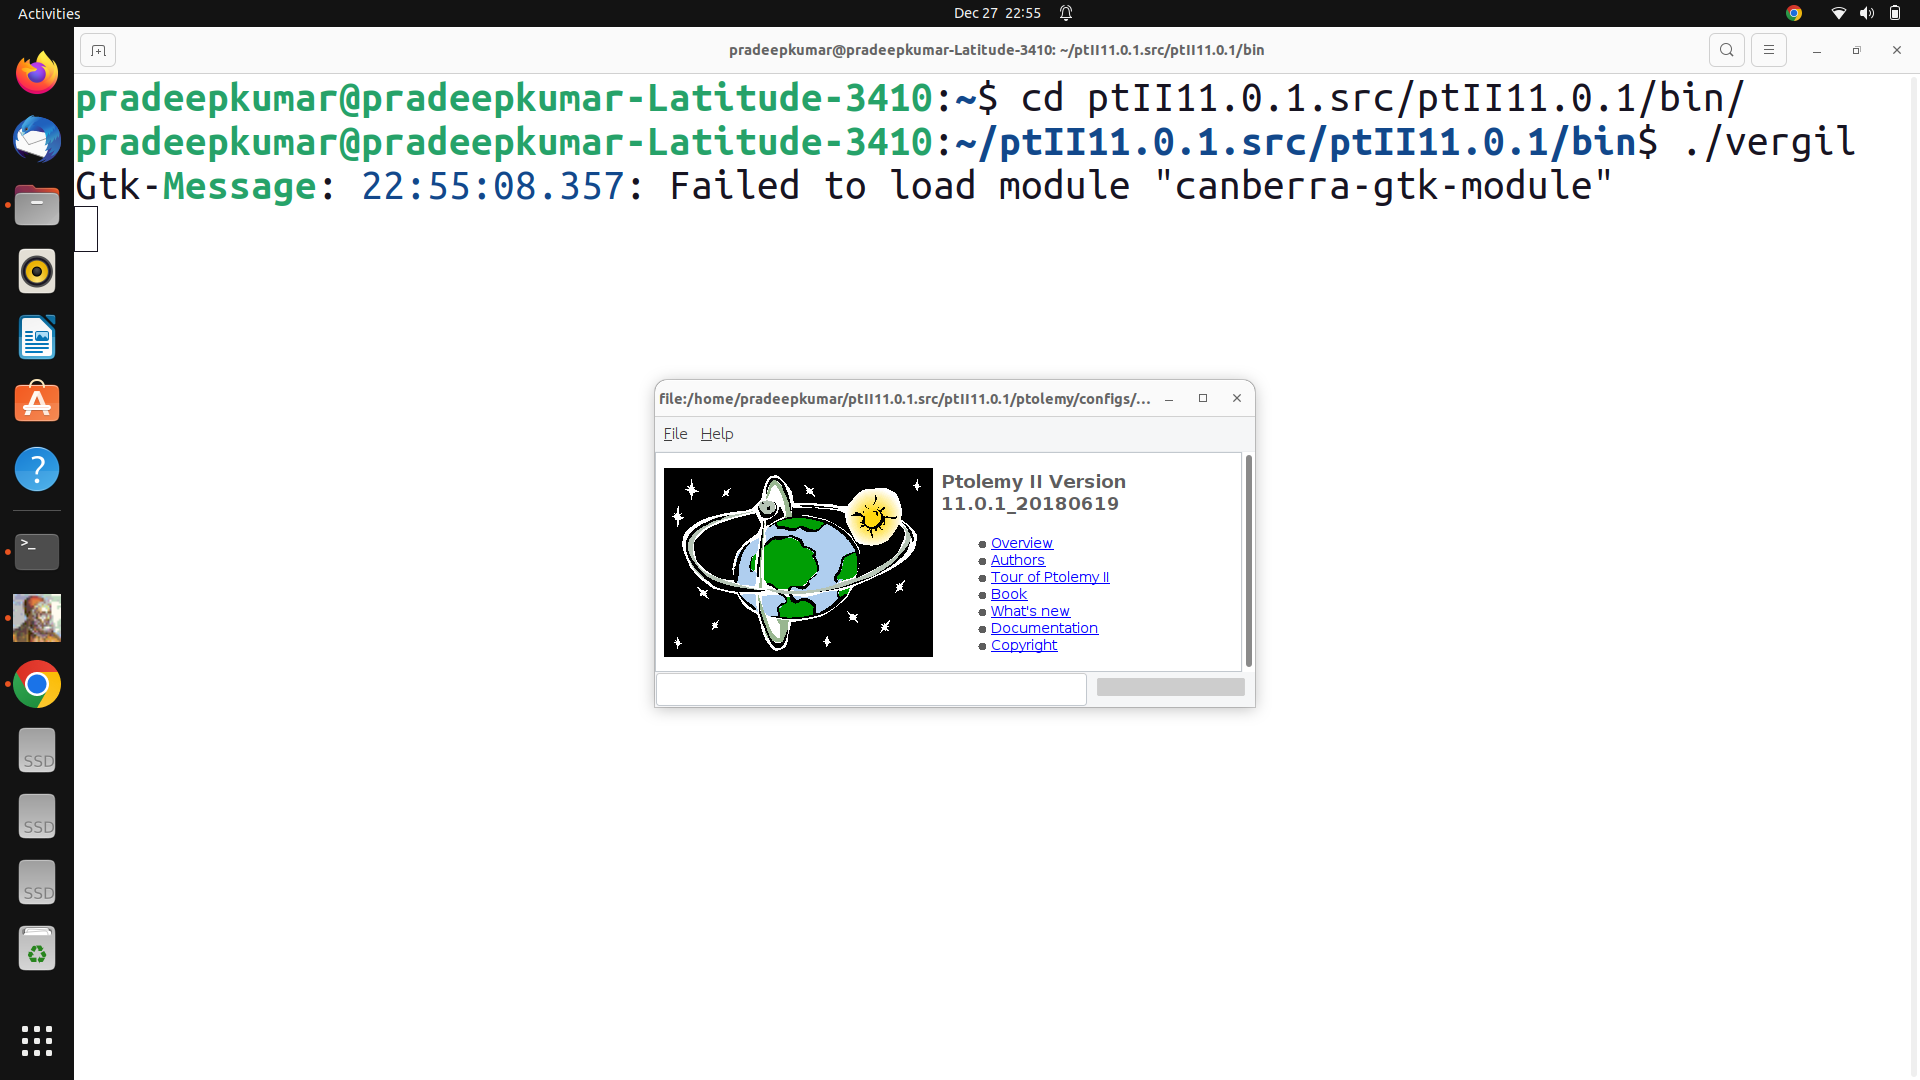
Ptolemy II
Ptolemy II


Then you can proceed to go to the documentation and other examples there of. For more details watch the Youtube video


Comments

Popular posts from this blog

How to Create Ubuntu 24.04 Bootable USB Using Rufus [Step-by-Step Guide]

How to Create Ubuntu 24.04 Bootable USB Using Rufus [Step-by-Step Guide] Are you planning to install or try Ubuntu 24.04 LTS ? The easiest and most reliable method is to create a bootable USB drive using Rufus on a Windows system. This detailed guide will help you create a Ubuntu 24.04 USB bootloader using Rufus with easy-to-follow steps and screenshots (optional). Here is the complete video of the bootloader creation and OS installation in Windows 11. 🧰 Requirements A USB flash drive (minimum 8GB recommended) A Windows PC Ubuntu 24.04 LTS ISO file Rufus USB creation tool 🧾 Steps to Create a Ubuntu 24.04 Bootable USB Using Rufus ✅ Step 1: Download Ubuntu 24.04 ISO Visit the official Ubuntu website and download the Ubuntu 24.04 LTS ISO file . ✅ Step 2: Download and Run Rufus Head to Rufus official site and download the latest version. Open the executable file (no installation required). ✅ Step 3: Insert USB Drive Plug in your USB drive. Rufus ...

Installing ns3 in Ubuntu 22.04 | Complete Instructions

In this post, we are going to see how to install ns-3.36.1 in Ubuntu 22.04. You can follow the video for complete details Tools used in this simulation: NS3 version ns-3.36.1  OS Used: Ubuntu 22.04 LTS Installation of NS3 (ns-3.36.1) There are some changes in the ns3 installation procedure and the dependencies. So open a terminal and issue the following commands Step 1:  Prerequisites $ sudo apt update In the following packages, all the required dependencies are taken care and you can install all these packages for the complete use of ns3. $ sudo apt install g++ python3 python3-dev pkg-config sqlite3 cmake python3-setuptools git qtbase5-dev qtchooser qt5-qmake qtbase5-dev-tools gir1.2-goocanvas-2.0 python3-gi python3-gi-cairo python3-pygraphviz gir1.2-gtk-3.0 ipython3 openmpi-bin openmpi-common openmpi-doc libopenmpi-dev autoconf cvs bzr unrar gsl-bin libgsl-dev libgslcblas0 wireshark tcpdump sqlite sqlite3 libsqlite3-dev  libxml2 libxml2-dev libc6-dev libc6-dev-i386 libc...

NS2 (NS-2.35) Installation in Ubuntu 11.10

This post will help you in installing Network Simulator 2 version NS2.35 in Ubuntu 11.10 Instructions Install Ubuntu Download NS-2.35 ( http://sourceforge.net/projects/nsnam/files/allinone/ns-allinone-2.35/ns-allinone-2.35.tar.gz/download ) Unzip or untar it to any folder (recommended is /home/ loginname) using the following commands one by one sudo apt-get update sudo apt-get install build-essential autoconf automake libxmu-dev tar zxvf ns-allinone-2.35.tar.gz cd ns-allinone-2.35 ./install Once installed the PATH information will be provided to you. Copy the PATH and LD_LIBRARY_PATH Variable to .bashrc (see a dot in the beginning) Input the path information in .bashrc file like this export PATH=$PATH:<Place your paths here> export LD_LIBRARY_PATH=$LD_LIBRARY_PATH: <place the LD_LIBRARY_PATHS> here. Once done, save the file and close execute the command source .bashrc try ns or nam to see whether your installation succeeded.