
Kali Linux along with Windows 10 Kali Linux 2019.
For Detailed Instructions: Please follow the Video Link
Step 1: Have a pen drive or USB Drive of minimum 8GB (16GB Pendrive) Format it to FAT32 Partition. Step 2: Check your Disk Drive Properties. MBR or GPT Master Boot Record, GPT- GUID Partition Table. See the following image, It shows the partition style as "Master Boot Record"
Step 3: Download bootable Software (RUFUS). Its a powerful USB bootloader creator software. rufus works only with windows. See the following image for rufus window.
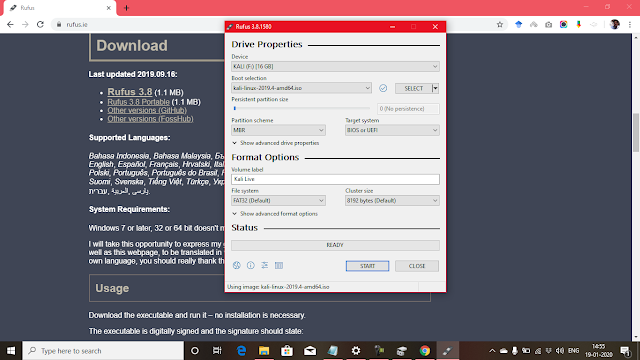
Use of DD Mode is preferred instead of ISO Model for Kali Linux (Else you might get an error like CD ROM Detection during installation...).
Use dd MODE as given in the following figure
Step 4: Reboot the system and bring the bootloader. Rebooting now... Step 5 : Press F12 or ESC or F1 as per the Laptop model you have. There will be two options: USB HDD or EFI (Select accordingly). In My case, I have selected USB HDD. Select Graphical Installation and continue the onscreen instructions. Partition need to be done for two logical partitions 1. SWAP Memory - 8GB 2. / - 100GB (I have given 250 GB).
Subscribe to My Youtube Channel - Engineering Clinic
For Detailed Instructions: Please follow the Video Link
 |
| Master Boot Record |

Use of DD Mode is preferred instead of ISO Model for Kali Linux (Else you might get an error like CD ROM Detection during installation...).
Use dd MODE as given in the following figure
 |
| Rufus Selection of DD or ISO Method. |
Subscribe to My Youtube Channel - Engineering Clinic
Thanks for posting keep updating it.
ReplyDeleteNode JS Training in Chennai
Node JS Course in Chennai
french classes
pearson vue test center in chennai
IoT Training in Chennai
spoken english centre in chennai
Xamarin Training in Chennai
spanish institute in chennai
ielts centre in chennai
content writing training in chennai
Node JS Training in OMR
Node JS Training in Porur
I am glad that I have visited your blog, really amazing. Waiting for further updates.
ReplyDeleteRPA Training in Chennai
RPA course in Chennai
RPA Training in Bangalore
RPA course in Bangalore
RPA Training in Coimbatore
Blue Prism Training in Chennai
UiPath Training in Chennai
RPA Training in Velachery
RPA Classes in Chennai